Load up your synth, we’re using Zebra2 and some Live 12 effects, and let’s make a classic dub siren. Sure you can sample one, but it’s fun to make too.
Today’s Synth Secrets focuses on another classic dub siren sample, heard right at the start of the legendary Jah Shaka’s The Commandments of Dub Series 1. If you’ve listened to a single jungle mix (or a few UK garage mixes), you’ve almost certainly heard this one.
The sound itself is incredibly simple, as most dub sirens are. The devil is in the details, though, and today, we’re going to focus on getting the timing and sonic vibe just right so that we really capture a convincing likeness to that well-loved sample. Deviating just a touch makes the whole thing sound just wrong.
Once we get the sonic character just right in a synth, we’re able to deviate from the original formula and build sounds that suit our tracks but that maintain exactly the right vibe, and a synth patch is just so much more versatile than a short one-shot sample for that kind of thing. Our tools today consist of u-he’s workhorse synthesizer Zebra2 and a couple of Ableton Live 12’s built-in effects – namely Hybrid Reverb and an impulse response from a spring reverb unit (it’s not dub without spring reverb).
What we love about Zebra2 is how precisely configurable it is. Everything from the exact contour of the waveform to the slope on the stages of the envelopes can be twisted to your precise needs, so it can take on any character you like. If you haven’t already downloaded a demo of u-he’s Zebra2, click on this link to do so.
Here’s the sound we’re making:
And in the context of a track it sounds like this. A great touch to add right before a heavy drop.
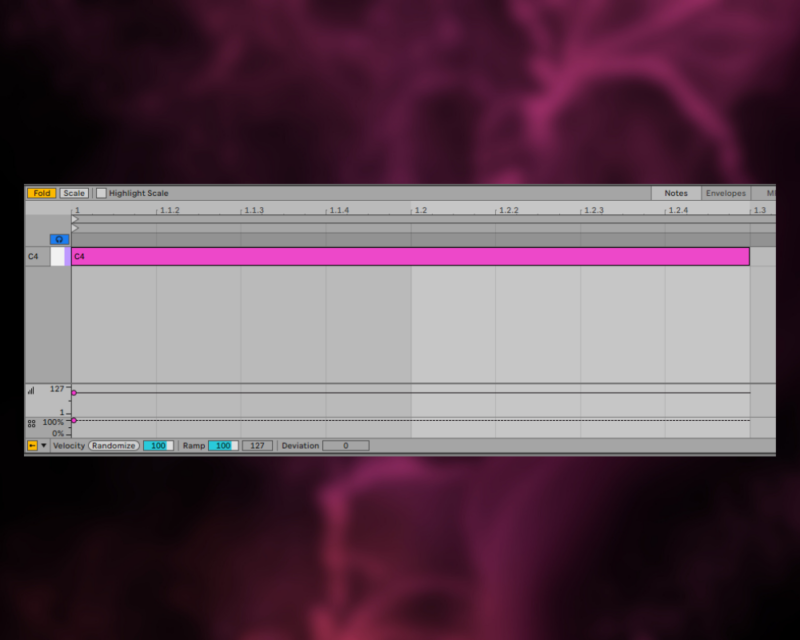
Set your DAW’s BPM to 174, and get ready to trigger the effect with a humble middle C (C4 on the piano roll).
Step 1: Setting the Foundation
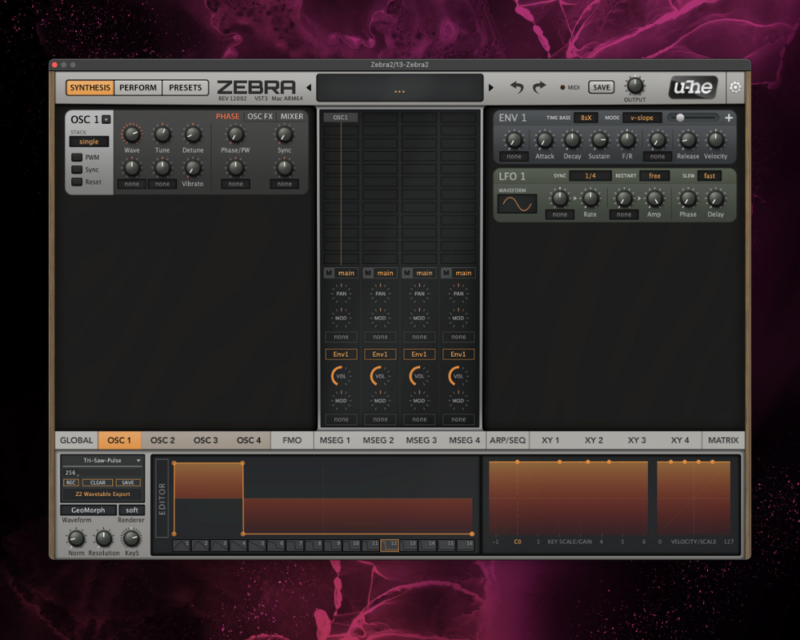
First, initialize the patch by selecting init at the bottom of the preset menu. Then go straight to the OSC 1 tab at the bottom to reveal the waveform selector. By default the selection is none. Click to open the menu of available wavetables and select Tri-Saw-Pulse which should be toward the end of the list.
Now select the 12th waveform on the table, which is a fairly narrow pulse wave.
We’re done in that area, now head up to the OSC 1 module at top left, change the Tune setting to 7.5 and turn the Detune down to -40.
As usual, at this stage we still have much work to do:
Step 2: Basic modulation
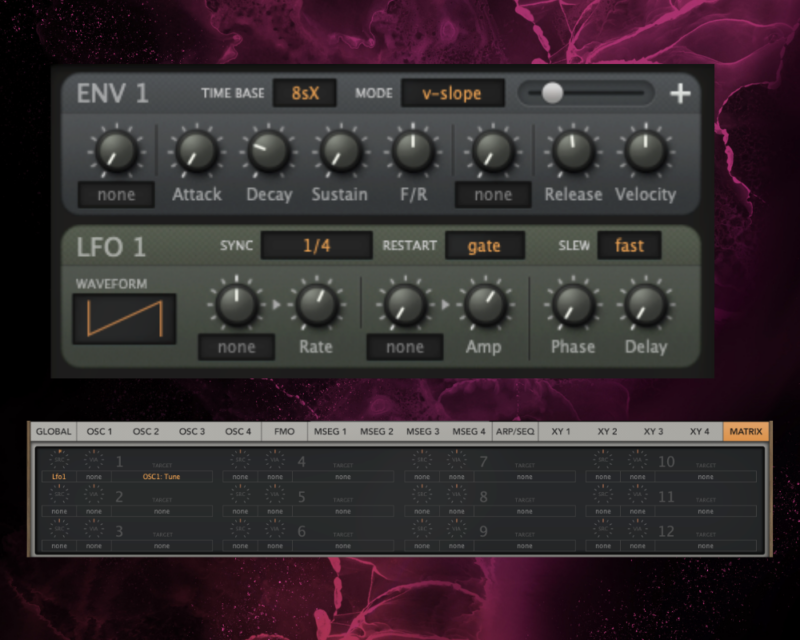
Let’s head to the ENV 1 module on the right hand side. We will start by using envelope 1 to give us a short, punchy, always-the-right-duration note. We do that by pulling the sustain down to zero and relying completely on the decay stage for the volume contour.
For fun, let’s turn the release up a good amount. That way, if you give the synth a really quick hit with your MIDI controller, you’ll actually trigger the release stage before the decay stage is over. This gives you a long hit that can be fun to play with, but it assures you that if you hold down the note you’ll get something that’s exactly the same duration as the sample we’re copying. It’s crucial that you set the decay value to exactly 28 on envelope 1 to get things to line up just right.
Then we go to LFO 1, change the waveform to Saw Up, switch the RESTART mode to gate, turn the Rate to 116 and the Amp to 61. Then open up the mod matrix by hitting the MATRIX tab at the bottom right, route Lfo1 to OSC 1 Tune, and turn the amount knob up to 8. Now we’re getting into familiar territory.
Step 3: Tone Shaping
Let’s do our first round of tone shaping, taking the edge off just a bit and adding subtle vintage vibe. Click on an empty cell in the main grid beneath OSC1 and select VCF1 to add a filter. Change the filter mode to LP Vintage, turn Cutoff down the tiniest bit (maybe to 140 or 145) but push the drive up to max for a little saturation.

Step 4: Two Habits of Highly Effective Synth Patches (Distortion and Delay)
Select the GLOBAL tab at the bottom left so we can see the FX grid. We will remove ModFX1 and replace that with a distortion module, Dist 3 (or Dist 4, it’s the same thing but we like moving in sequence). Change the type to Tube 2 Stages, crank the input up to about noon, then trim back the output a bit. Those old dub samples had a lot of layers of color (analog synths with analog filters plugged into analog mixers then tape machines then vinyl cutters then turntable styli then the input stage of whatever gear was used to lift the sample from the record, and on and on and on…) so we should explore adding bits of that grit every chance we get.
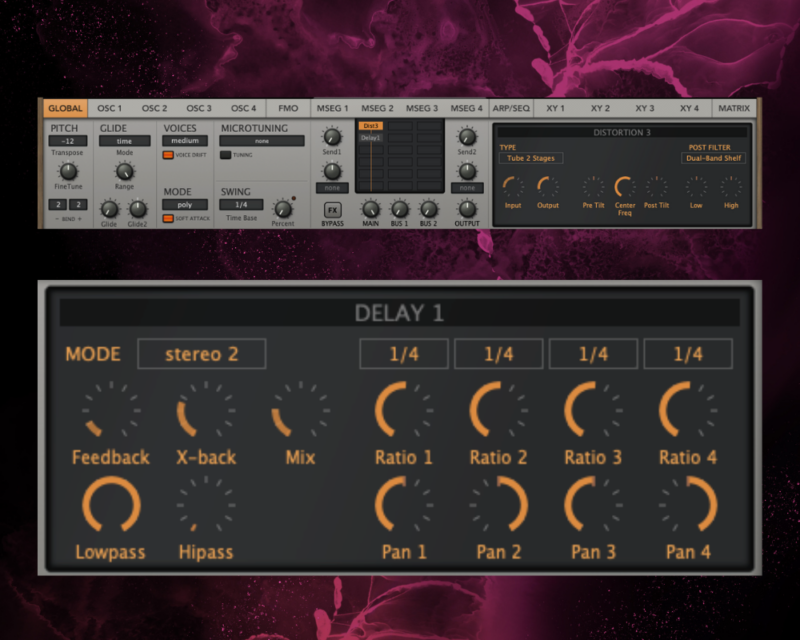
Now add Delay 1 to the next cell in the FX matrix and just turn the mix up a touch. The default settings are fine otherwise.
Step 5: We’ll Do It (in) Live
The only thing Zebra2 lacks for that authentic dub vibe is a spring reverb. Ableton Live 12’s Hybrid Reverb device boasts a rich convolution reverb section with some great spring reverb impulse responses, though any capable spring reverb unit, be it real or virtual, should get you there (u-he’s Twangstrom, Softube’s Spring Reverb, and Arturia’s Rev SPRING-636 are some capable replacements).
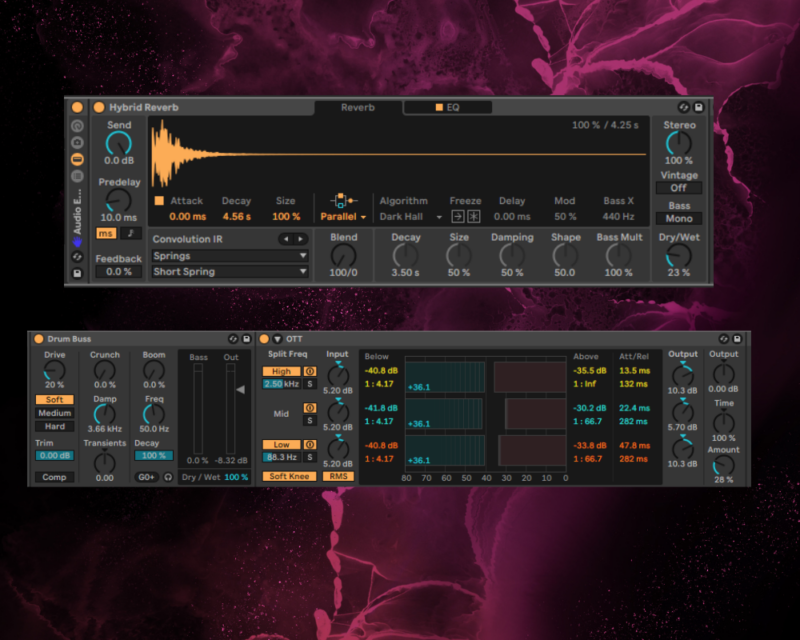
We’re going to call up an instance of Hybrid Reverb and start by moving the Blend knob all the way to the left, soloing the convolution section. That impulse has some weird resonance on the tail so we’ll turn down the Decay to minimize them. Give it about a 25% dry/wet mix. Then we’ll add Drum Buss, one of our favorite “instant thiccness” tools, giving it a bit of drive and dampening off some high frequencies (make sure yours matches what you see in the image). A little bit of Live’s Multiband Dynamics, specifically the OTT preset with the amount set to about 30%, and I think we can be happy with the result.