In this Beat Dissected, we break down a beat inspired by Ghost Hardware by Burial.
Burial is a producer who needs no introduction. Due to his anonymity, he’s also a producer who is quite hard to introduce, but let’s give it a go anyway.
When it comes to writing up a list of prodigious electronic music producers of the 21st century, Burial is a name that few would argue against being close to the top.
Here is an artist whose unique sonic thumbprint is recognizable from the first vinyl crackle or dampened kick of any of his tracks, and who has influenced countless producers.
Beyond his technical production style, perhaps what sets Burial apart from the rest of the musical landscape is his uncanny ability to capture that intangible feeling of isolation, and present it in a beautiful and atmospheric way that listeners can get lost in.
In this Beat Dissected, we will be recreating this feeling by building a beat inspired by Burial’s Ghost Hardware’.
Here’s what we’ll be making today:
And here it is with more elements for context:
As ever, click any image to enlarge!
If you want to download the session to follow along you can do:
Step 1: Kick
For the kick in our beat, we’ll be stealing a kick hit from an acoustic drum beat loop. Load ‘Beat Mode 115 bpm’ from Live in Simpler and trim the sample to isolate one of the kick hits in the loop.
The kick pattern is a simple four to the floor loop with an extra kick hit on the final eighth note of the bar. When programming the kick – and all of the drum hits in this tutorial – turn off the grid in Ableton so that every hit is slightly off grid for added groove. With the kick, it also helps to add some variation to the velocity of each hit.
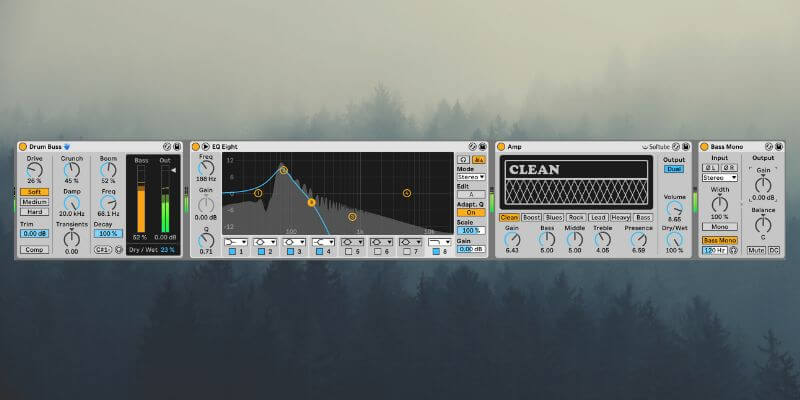
To muffle the kick, and beef up the bass content, load Drum Buss (to add drive and crunch), EQ 8 (to roll off the highs and mids, and to boost the lows), and Amp (for a bit more saturation) on the kick channel.
Make sure Amp’s output is set to Dual for stereo width. Finally load Utility with the Bass Mono preset at the end of the chain.
Step 2: Rim
In place of a snare, Burial opts for a rim shot in most of his tracks. Fortunately for us, in the Ableton audio library there is a percussion loop called ‘Burial Roller 80 bpm’ which contains Burial style rim shots that we can cut out for our own uses.
Slice the loop up in a similar fashion to the below image.
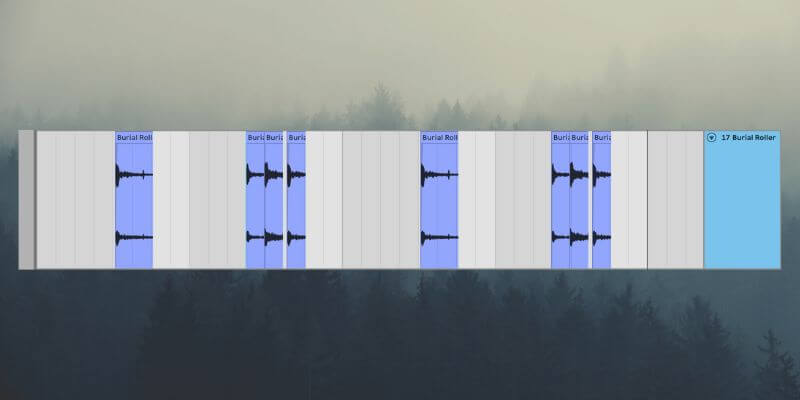
Each hit in the pattern is a different rim shot from the Burial Roller loop. Using a different part of the loop for each rim hit is essential for that natural Burial sound.
In addition, turn off the grid and shift the one-shots slightly so they are not perfectly in time.
Time to process the rim shot. Start with an EQ with the highs and lows rolled off, and a slight boost to the body of the rim.
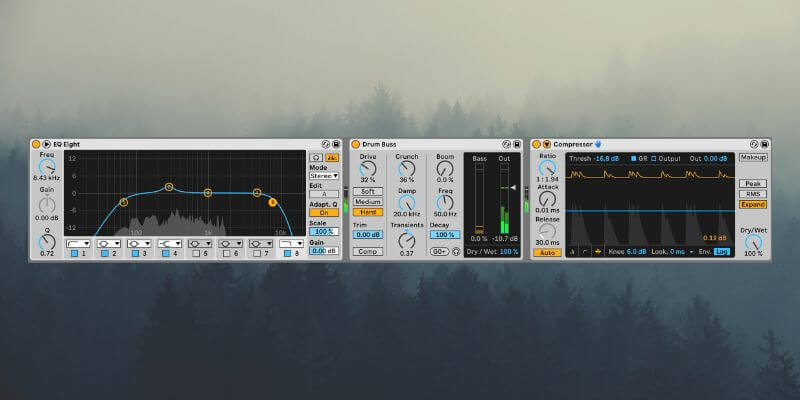
With Drum Buss add some Hard Drive and Crunch, and boost the Transients. Next, emphasize the transients further with Compressor in Expand mode.
With the rim shot added, here’s how the beat sounds.
Step 3: Hi Hats
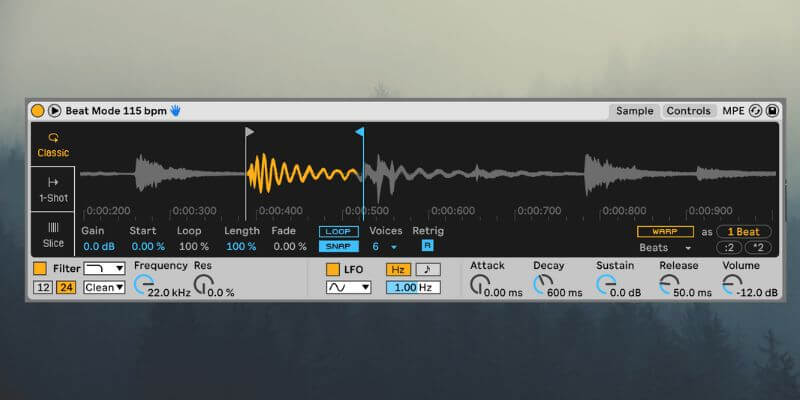
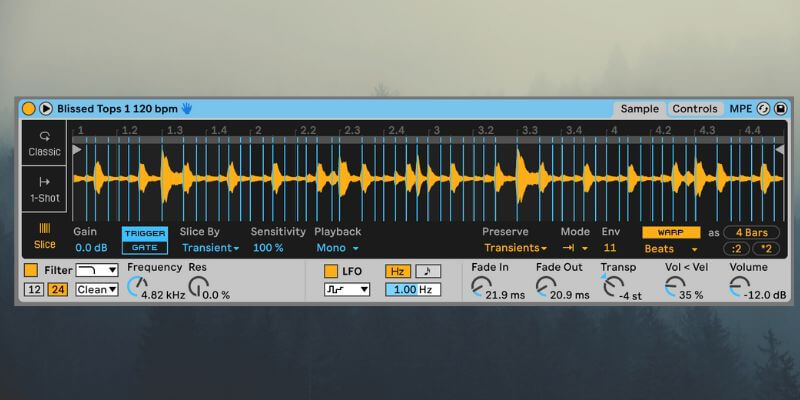
For the hi-hats, we will again use an acoustic drum loop, ‘Blissed Tops 1 120 bpm’ works well.
Load the loop in Simpler and set Simpler to Slice mode. This automatically assigns each hi hat hit in the loop to a different MIDI note allowing you to jam a pattern until you find something that works. Pitch the sample down by four octaves and filter the top end frequencies above 4.5kHz.
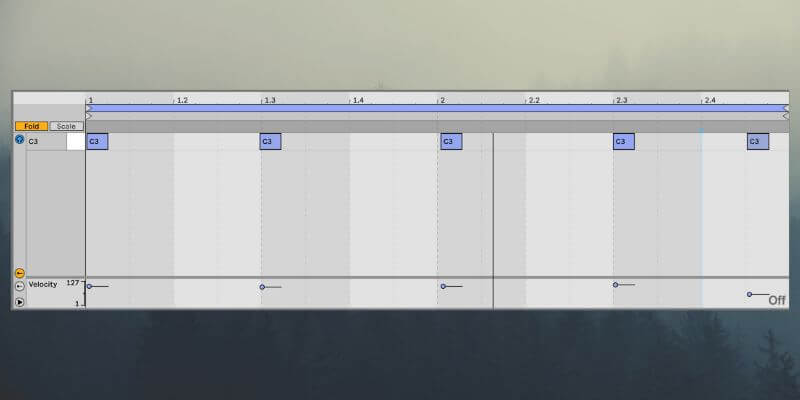
Here’s the MIDI loop we programmed.
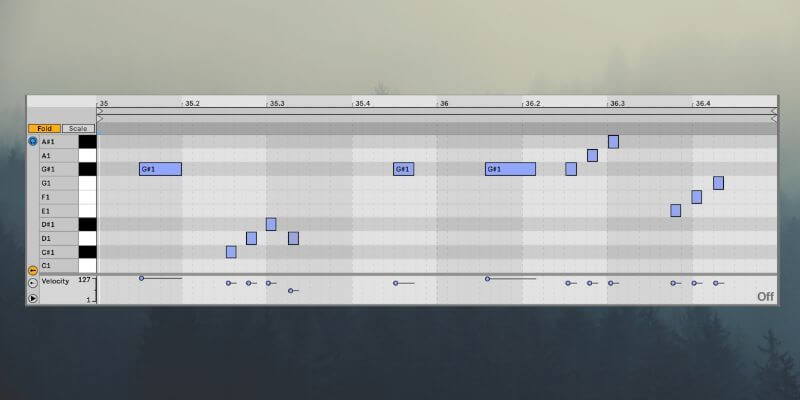
Again, notice the velocity variation and off-grid programming.
In terms of processing, this time use Saturator to add some substantial Analog Clip Drive, EQ 8 to cut out frequencies below 1.2kHz and above 4kHz, and Glue Compressor to bring the hats together.
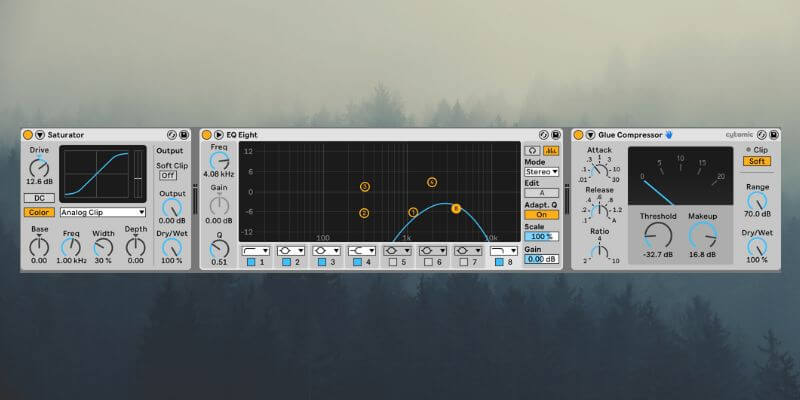
Glue Compressor is key here as it helps to provide the illusion that this is a recording of a real drummer.
Here’s what we have now:
Step 4: Extra Elements
Burial’s drum beats are intricate and layered. To achieve this, we will add three layers of various sounds.
First add a shaker which occurs on the first off beat of the first and third bar. We’ve used the sample ‘Shaker Blueprint’, pitched it down 13 semitones and trimmed the start of the sample to help blend it into the groove.
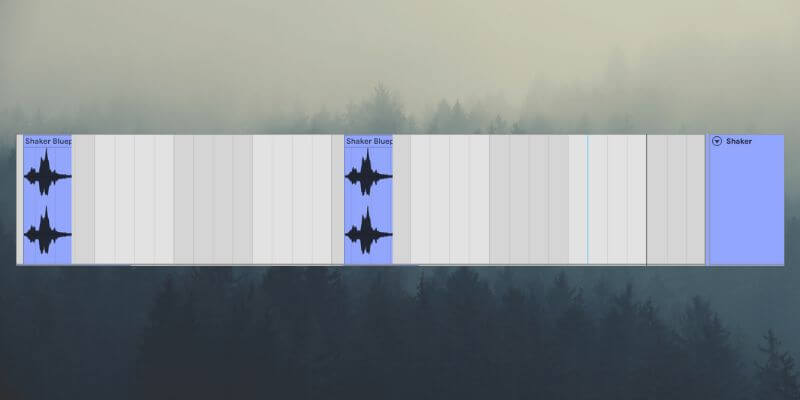
You’ll notice the timing of the shaker varies slightly between bar one and three.
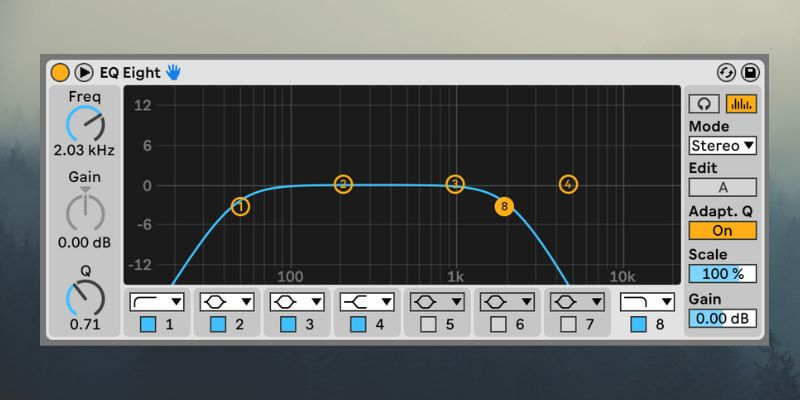
In terms of processing, we only need an EQ for the shaker. Remove the sub frequencies and higher frequencies above 2kHz.
Now for some vocal textures. First add the tail of the sample ‘Vox Skatter Short’ right at the start of bar one and three. Add a short reverb and filter out frequencies below 600Hz and above 2kHz with EQ 8.
This vocal sample acts almost like a crash.
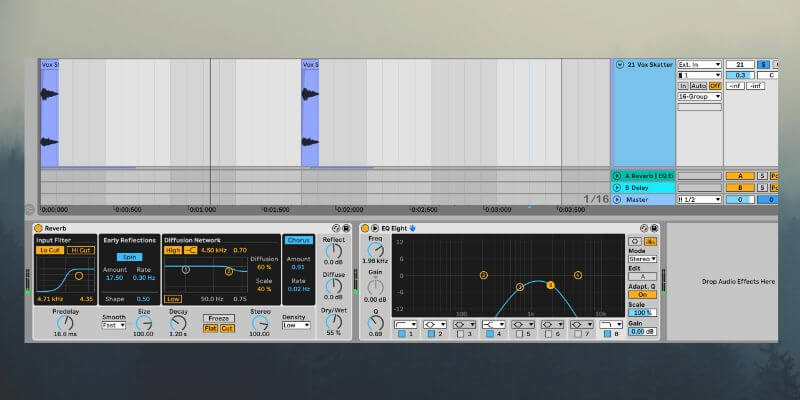
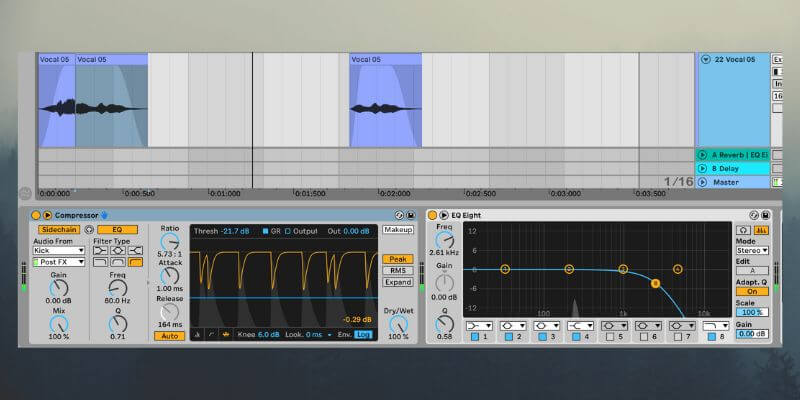
Finally add the tail end of the sample ‘Vocal 05’ pitched up a semitone. Add heavy sidechain compression triggered by the kick for movement, roll off frequencies above 2.6kHz with EQ 8, and add a lengthy reverb.
This vocal acts as a melodic and atmospheric element.
Here’s what we have now:
Step 5: Vinyl Atmosphere
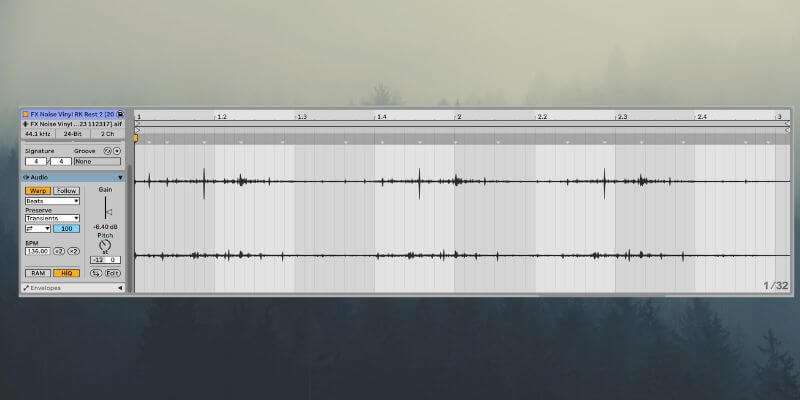
Now it’s time to add some iconic Burial vinyl crackle. The sample ‘FX Noise Vinyl RK Rest 2’ will work nicely. It’s not long enough, so duplicate it a couple of times, cross-fade the duplications together to avoid pops and then merge them into one audio file using Cmd/Ctrl + J.
Now shift the joined sample down an octave.
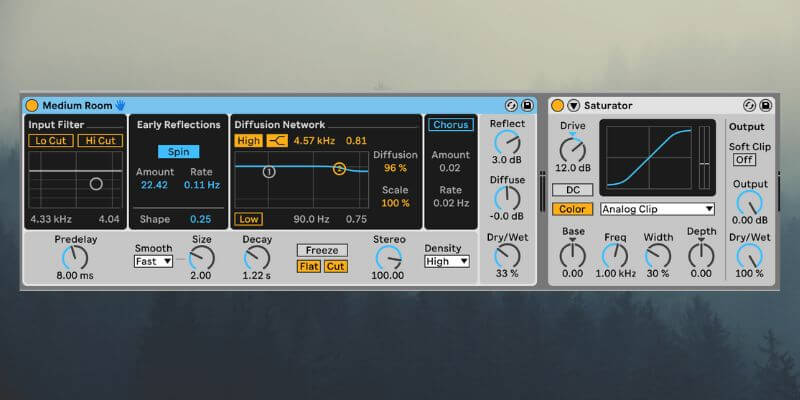
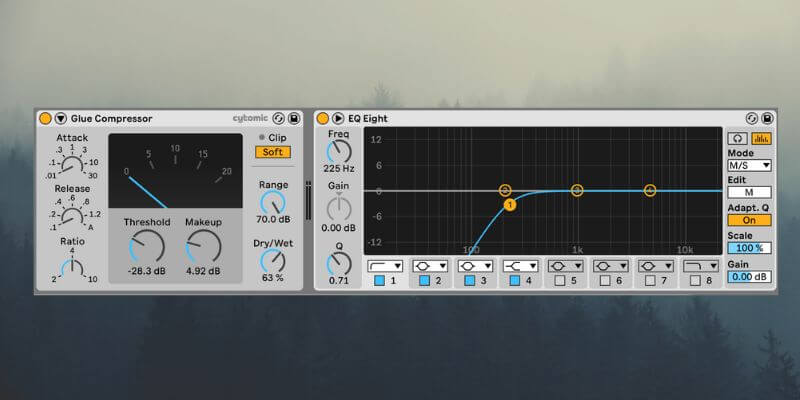
To make the crackle extra atmospheric, add Reverb with 1.2 seconds of delay and Saturator with 12dB of Analog Clip drive. In addition, load Glue Compressor with an instant attack and release and -10dB of gain reduction, and roll off frequencies below 225Hz with EQ 8.
Here’s the beat with the vinyl atmosphere added:
Step 6: Group processing
Finally we’ll bring the beat together with some group processing.
Group all the tracks in the beat together by selecting all the tracks and pressing Cmd/Ctrl + G.
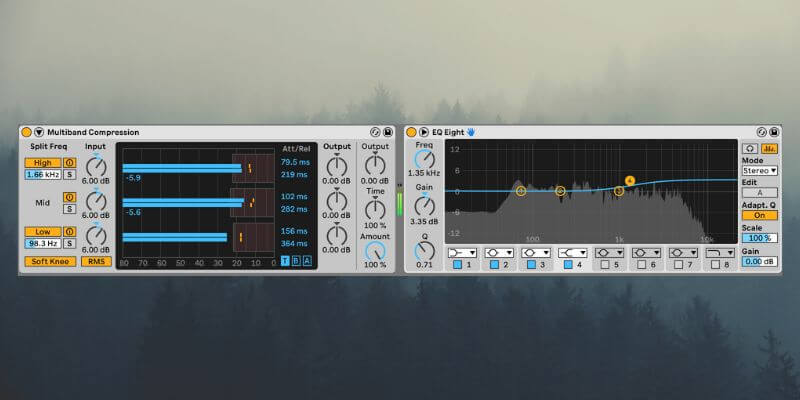
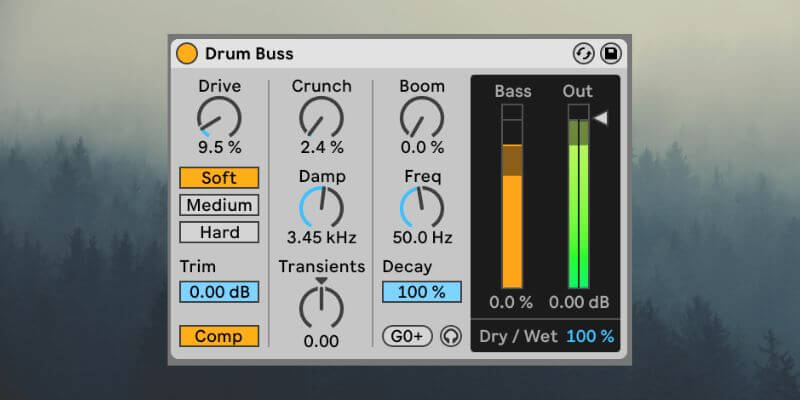
On the group load the Multiband Dynamics preset Multiband Compression. Next, use EQ 8 to boost a high shelf at 1.35kHz by around 3dB. Finally use Drum Buss to add 9% Drive, 2% Crunch. In addition turn on Comp and set Damp to 3.45 Hz.
Here’s what our final beat sounds like:
And with a pad and bass for context:
If you like this Beat Dissected you may enjoy our Burial reverb tutorial also. Just click the image below to read: